How to Quickly Import Texture Maps into Blender
The purpose of this article is to show 3D artists how to import a set of texture maps into Blender in 1 step.Enable Node Wrangler
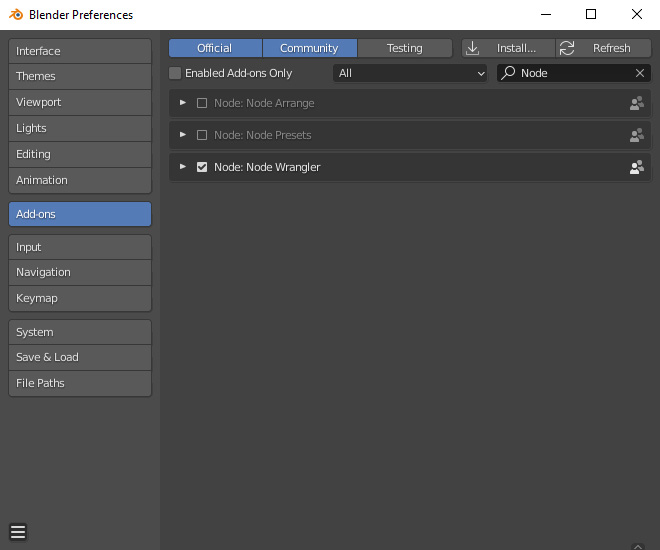
Blender already has a handy built-in tool for importing texture sets. It is the "Node Wrangler" add-on.To enable Node Wrangler,
- Go to Edit > Preferences...
- Search for "Node"
- Check the box next to Node Wrangler
Import Texture Maps
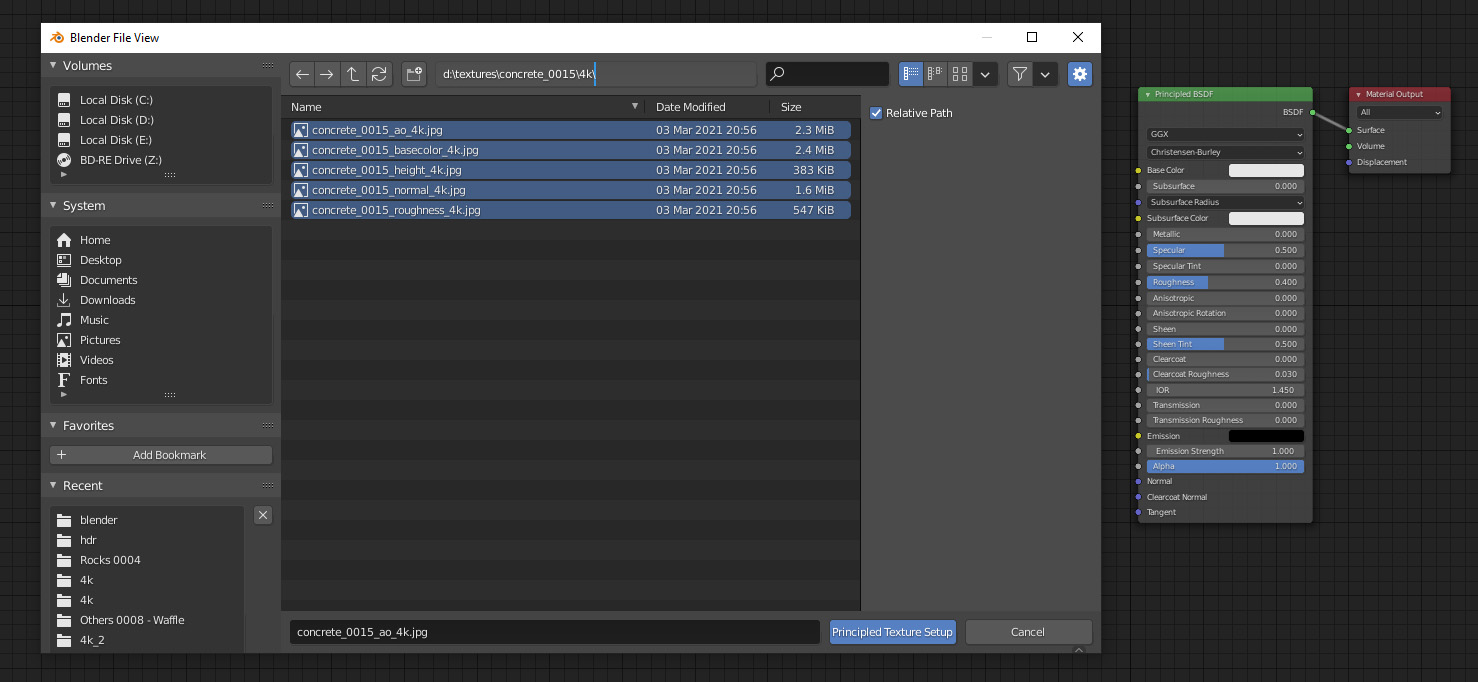
Assuming texture maps have been downloaded from TextureCan.com,- Select the Principled BSDF node
- Press Ctrl + Shift + T
- Blender File View will be opened
- Multi-select required texture maps
(Select *_normal_opengl.png rather than *_nornal_directx.png for Blender) - Press the "Principled Texture Setup" button
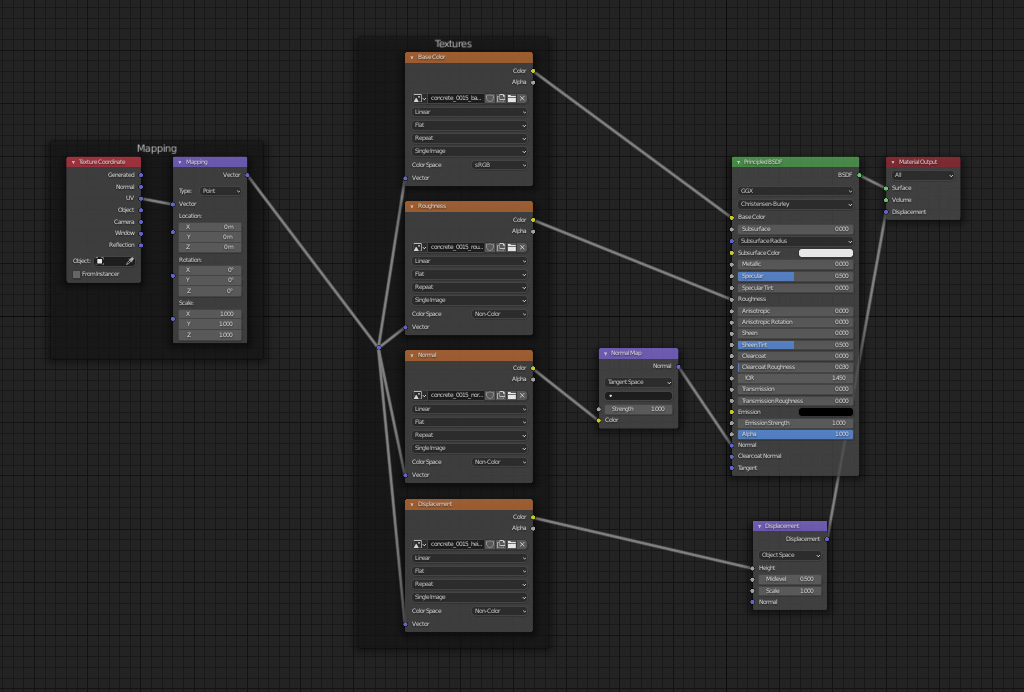
Node Wrangler will automatically connect selected texture maps to related nodes, except the opacity map (if any). Opacity(or alpha) needed to be handled manually. Luckily most textures do not require an opacity map.
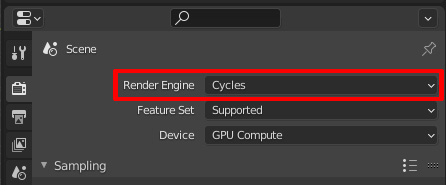
Switch to Cycles and Enable Displacement
Currently, only "Cycles" supports the height / displacement map.If you want to enable displacement, the Render Engine should be set to Cycles (Default: Eevee).
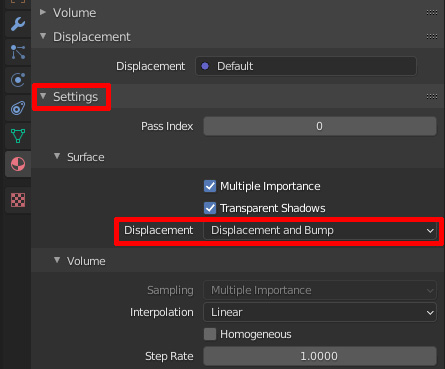
Next, go to "Material Properties" panel, scroll down to the "Settings". After expanding it, please change the Displacement value from "Bump Only" to "Displacement and Bump".
At this stage, all textures have been sucessfully imported.
Reduce the Displacement Scale (Optional)
If the displacement is too exaggerated, you may need to reduce the scale until it becomes reasonable.Since the Shader Editor is still open, the displacement scale can be adjusted at the same time though this step is optional.
Here is the result:

The following steps are optional and should be tweaked based on model shapes and texture characteristics.
Scale of Texture
In this case, the square should be smaller. To do that,- Go to Shading Tab
- Find the Mapping node
- Drag down along the X, Y and Z values, so that all 3 values can be adjusted at the same time
- Input 2 (case by case, do not copy it for all textures)
Adjust Texture Pattern
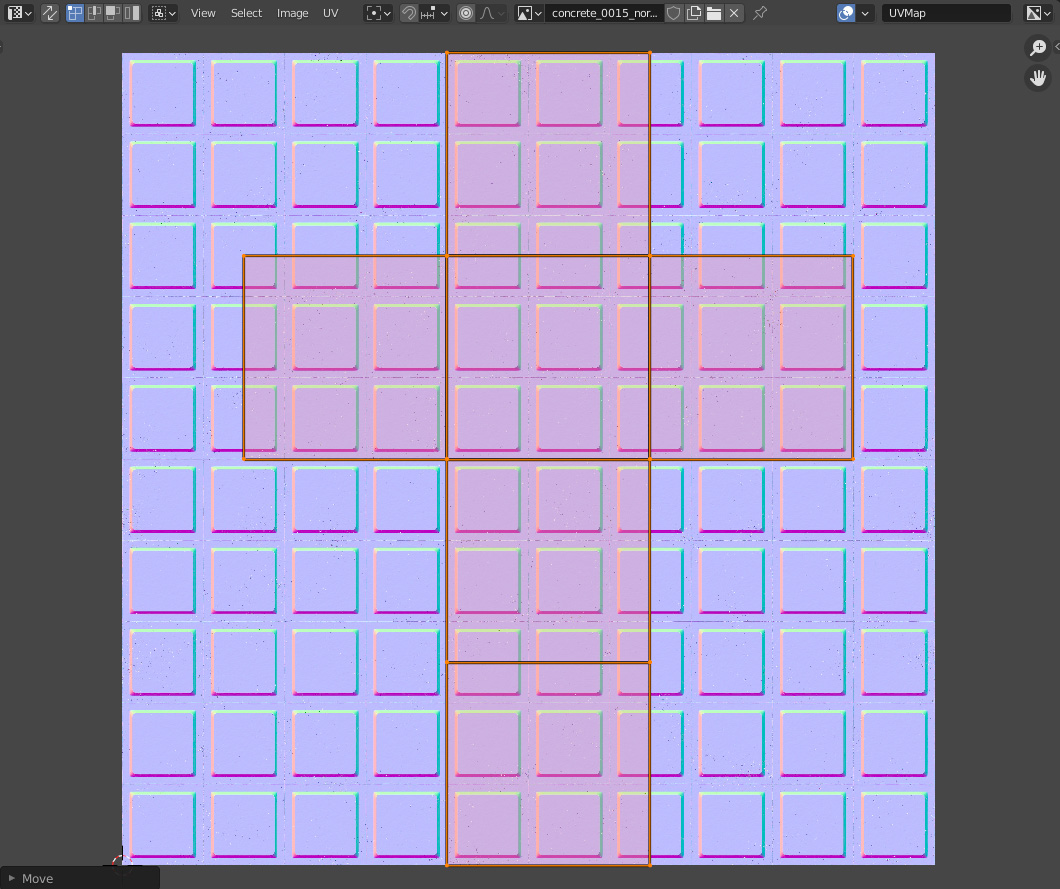
The texture alignment can also be done by the Mapping Node.To show you another way, let's go to UV Editing Tab.
By slightly moving the projected vertices to the right, the pattern now perfectly fits into the cube model.
Ensure to Have Enough Vertices
Cycles is on and "Displacement and Bump" is set, why the height map still has no effect?Unlike normal maps which do not require high poly meshes, a height map needs a subdivided mesh in order to form actual displacement. To make the height map work, the model must have enough vertices. Let's subdivide the model.
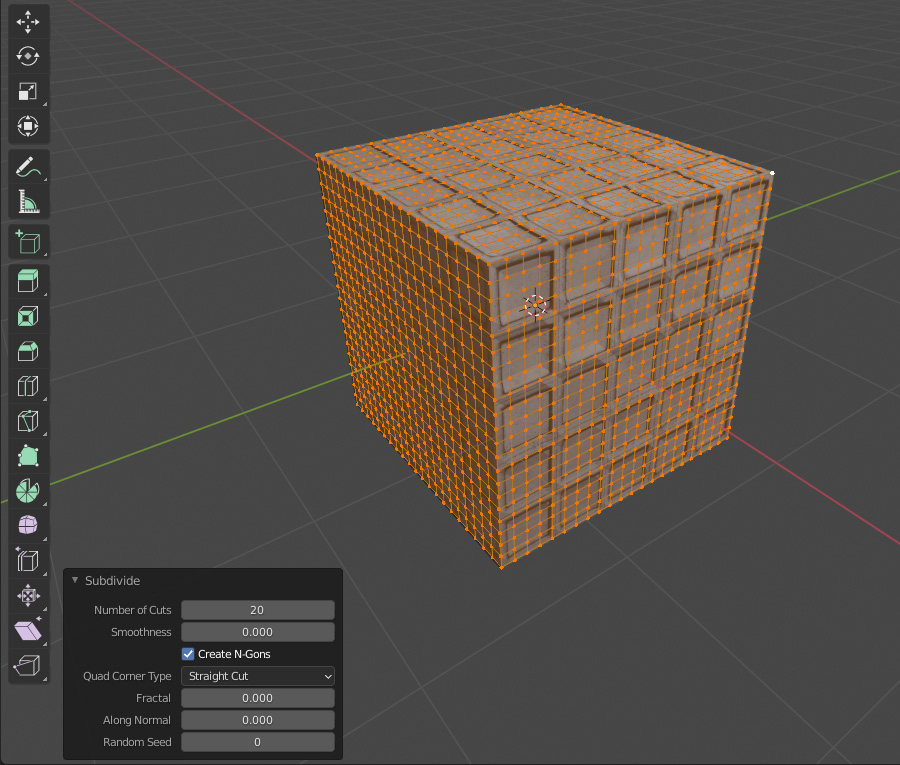
If there are triangles in the displacement, it means the model still does not have enough vertices.
It can be fixed by adding Subdivision Surface modifier.
Crank up the value to 3
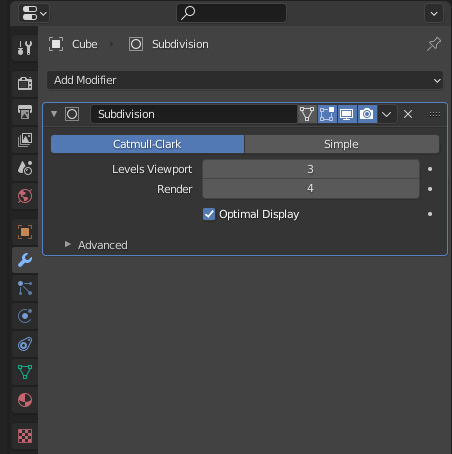
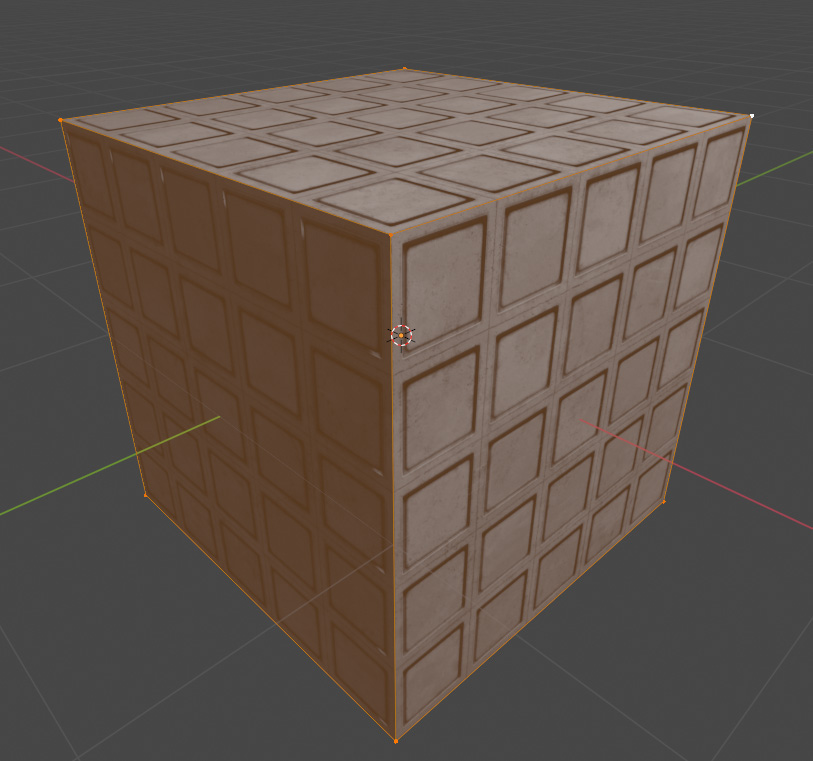
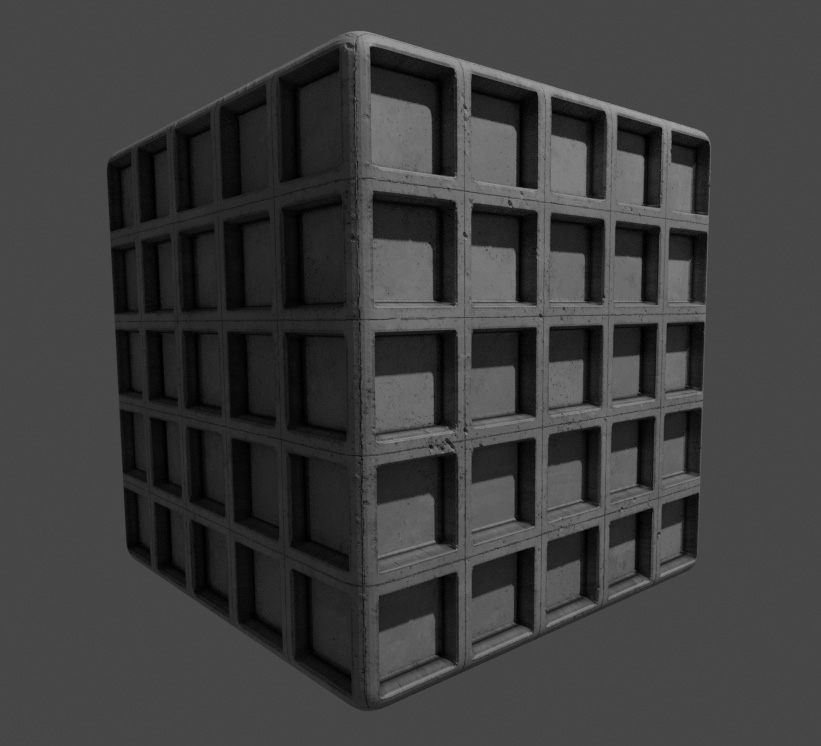
The model now has a nice displacement.
To summarize, you only need to press Ctrl + Shift + T on the Principled BSDF node. Then ensure Cycles is on and "Displacement and Bump" is set
That's all for the tutorial.
Thank you for your reading!
Happy texturing!